

Practise these 6 yoga postures for a healthy spine and back
A healthy back contributes to a healthy life and the six postures below, if practiced daily, can help to heal an injured back. Practicing these simple postures doesn’t have to take a lot of time. They can be done in 5-10 minutes (depending how many times you repeat each move.) Whatever you choose, it’s definitely worthwhile to add them to your daily routine as a preventative measure against back stiffness and soreness; and for a healthy spine.
1. Supta Matsyendrasana (Supine spinal twist pose)
- Lie on your back.
- Bend knees and place soles of both feet flat on the ground, directly in front of buttocks.
- Exhale and slowly lower legs to the right, trying to bring knees down to the floor. Extend your right leg, and cross your left knee over to the right side.
- At the same time, gently turn the head and neck in the opposite direction from the legs. Uniformly twist the entire spine.
- Extend your left arm out to the side and rest your right hand on your left knee.
- Hold breath in the final position while counting three seconds.
- Inhale, untwist the spine, bend both knees and raise them to their upright position, soles of feet on the ground.
- Repeat on the left side to complete one round.
- Practise 5 complete rounds.
Benefits: This asana massages the abdominal muscles and organs, and helps improve digestion and eliminate constipation. The twisting stretch of the spinal muscles relieves the strain and stiffness caused by prolonged sitting. This pose calms the mind and relaxes the body. It is also great for the relief of lower back pain, as it opens the shoulders, elongating the spine.
Contraindications: Neck, back or hip injury.
2. Jhulana Lurhakanasana (rock side to side)
- Lie flat on your back.
- Bend both legs to chest.
- Interlock fingers of both hands and clasp them around shins just below knees. (Starting position.)
- Roll body side to side 5 to 10 times, touching the sides of legs to the floor.
Benefits: This asana massages the back, buttocks and hips. It is most useful if done first thing in the morning after waking.
Practice note: Use a folded blanket for this practice so that there is no possibility of causing damage to the spine. While rocking back, the head should remain forward. Be careful not to hit the head on the floor.
3. Marjariasana (cat/cow stretch pose)
- Sit in vajrasana (thunderbolt pose), heels out, toes touching.
- Raise buttocks into kneeling position.
- Lean forward, placing hands flat on the floor. Stack shoulders over wrists, fingers facing forward.
- Line hands up with knees, with arms and thighs should be perpendicular to the floor.
- Keep knees together or slightly separated. (Starting position).
- Inhale, raise the head and depress the spine, pressing the belly button towards the ground so the back becomes concave.
- Expand the abdomen fully, fill the lungs with the maximum amount of air. Hold breath for 3 seconds.
- Exhale, lower the head and stretch the spine upward. Pull the chin towards the chest.
- At the end of the exhalation, contract the abdomen (pull the belly button towards the spine) and pull in (squeeze) the buttocks.
- The head will now be between the arms, facing the thighs. Hold the breath for 3 seconds, accentuating the arch of the spine and the abdominal contraction. This is one round
Benefits: This asana improves the flexibility of the neck, shoulders and spine. It gently tones the female reproductive system. It may be safely practised up to the sixth month of pregnancy; forceful contraction of the abdomen, however, should be avoided after 3 months. Women suffering from menstrual disorders and leucorrhea will obtain relief by doing marjariasana and it may be practised during menstruation for relief of cramps.
4. Parsva Sukhasana (Seated side bend)
- Start in easy pose (legs crossed. Spine, head and neck aligned over pelvis.)
- Place your left hand on the floor with your elbow slightly bent.
- Reach your right arm up and overhead and fold to the left side.
- Feel the fold come from the thoracic and lumbar spine.
- Hold the pose for 30 seconds to 1 minute, switch sides and repeat. This is one round.
- Practise 5 complete rounds.
Benefits: The seated side bend is a soothing yoga pose that stretches the neck, shoulders, back and obliques. This pose helps to relax the mind and relieves stress and anxiety. It is also beneficial in bending the spine laterally, increasing the range of motion of the spine to the right and left side.
Contraindications: Hips, back or shoulder injury.
5. Supta Baddha Konasana (Reclined bound angle pose)
- Sit on the floor, bend your legs and pull your knees toward your body.
- Let your thighs fall open, press the soles of your feet together and carefully pull your heels toward your pelvis.
- Exhale and lie down with your arms alongside your body and your palms facing up.
- Stay in reclining bound angle pose for 1 to 5 minutes.
Benefits: The reclined bound angle pose stretches the groin, inner thighs, and hips and helps relieve symptoms of stress, anxiety and depression. It also stimulates the abdominal and reproductive organs, improves digestion and increases blood circulation. This pose also relieves tension in the iliacus and psoas muscles, relieving strain in the lumbar spine.
Practice note: Start with bound angle pose (baddha konasana) and then lower yourself slowly to the ground, laying on your back for reclined bound angle pose. Follow-up with standing poses, such as the Windmill, seated twists or forward bends.
Contraindications: Knee or groin injury and lower back pain.
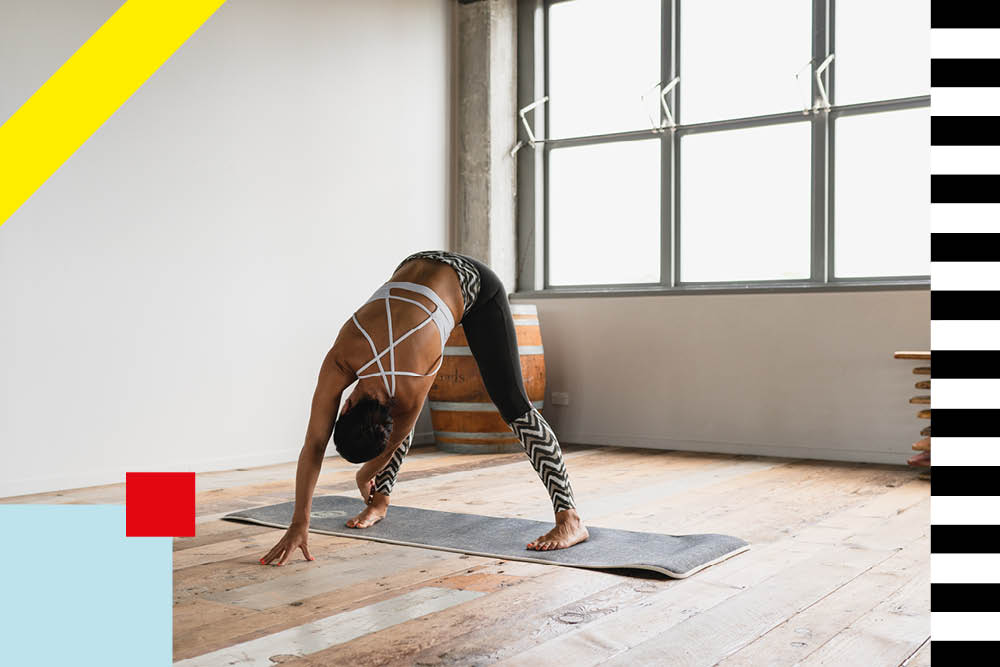
6. Parivrtta Prasarita Padotanasana (Standing wide-legged forward bend with twist aka Windmill)
- Begin in a wide-leg forward bend. Then move your right hand to the center of the mat. Line your middle finger up between the center of your eyebrows.
- Inhale, reach your left arm up toward the ceiling, twist your torso to the left and turn your head to follow your arm. Look up towards your left thumb.
- Slightly lean back with your chest. Breathe here for 30 seconds or at least three deep breaths.
- Untwist your torso and switch hands. Twist to your right. Hold for 30 seconds (three deep breaths). This is one round.
- Practice 5 complete rounds.
Benefits: The standing wide-legged forward bend with twist post lengthens and strengthens the spine, opens the shoulders, strengthens the core and stretches the hamstrings, calves, hips and lower back. This pose stimulates the abdominal organs, improving digestion; helps to detoxify the body and tonifies the reproductive organs.
Contraindications: Back, shoulder or neck injury.
Remember to ensure that you move your spine in all six directions, which ever postures you choose for your daily practice: sagittally (forward and backward), laterally (side bend) right and left, and transverse (twist right, twist left), to get a full complement of movement and increase the range of motion of the spine. These steps will ensure you have a healthy spine for life.
Mimi Adeogba is a Yoga Alliance Continuing Education Provider and is e-RYT 500-Hour certified with the Yoga Alliance, USA. She is also the founder of Swadhyaya Yoga School. She is trained in Ayurveda and holds two degrees in Naturology, a D.N. and a Ph.D., from American Institute of Holistic Theology, Birmingham, Alabama, USA. She studied various disciplines of biological sciences at Yale University, Baylor College of Medicine, and New Mexico State University.